Installing and Servicing your Forge DV/BOV
#1
 12-07-2007, 08:31 PM

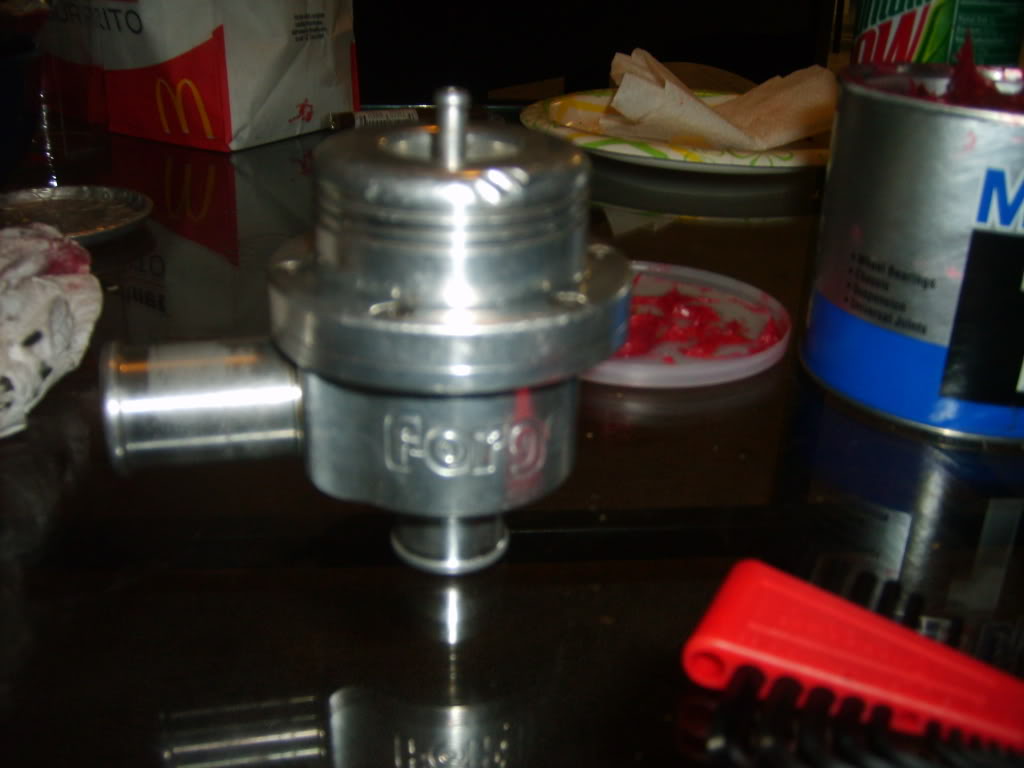
Swapped my Forge 006 out for my Forge 004 so i thought i would do a quick write-up so we dont keep having to outsource links for DIY's
Tools Required [ul][*]Socket Wrench[*]T30 Hex Bit (unless you have really small hands)[*]Screwdriver[*]New Vacuum hose (if yours is old or cracking)[*]Clamps [/ul]
Servicing the Valve [ul][*]Remove the 6 screws using a 2mm hex key. As soon as you remove the screws it should want to pop open to release the springs tension.[/ul]BOV
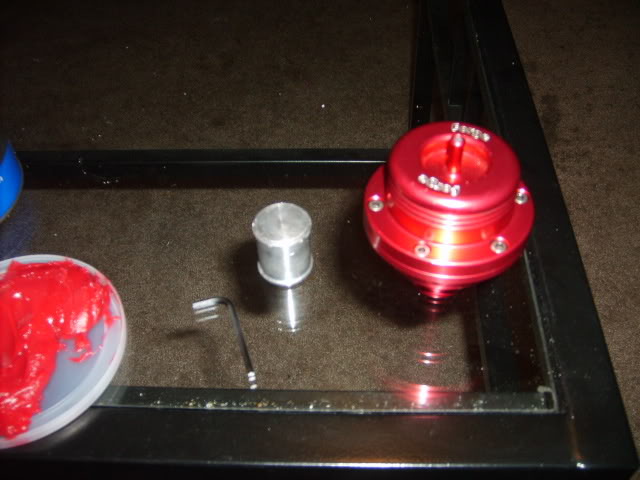
DV
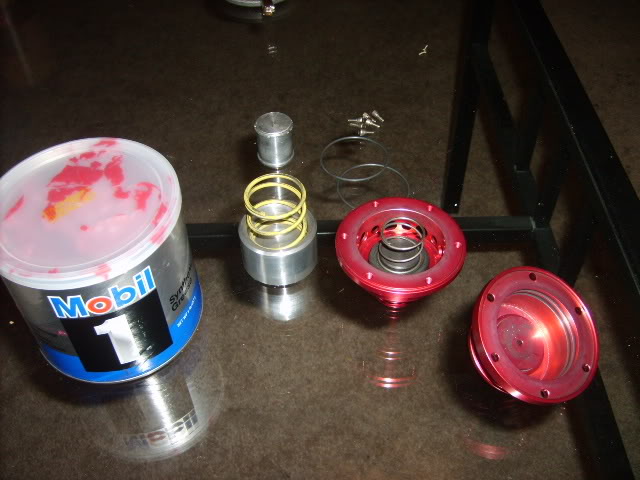
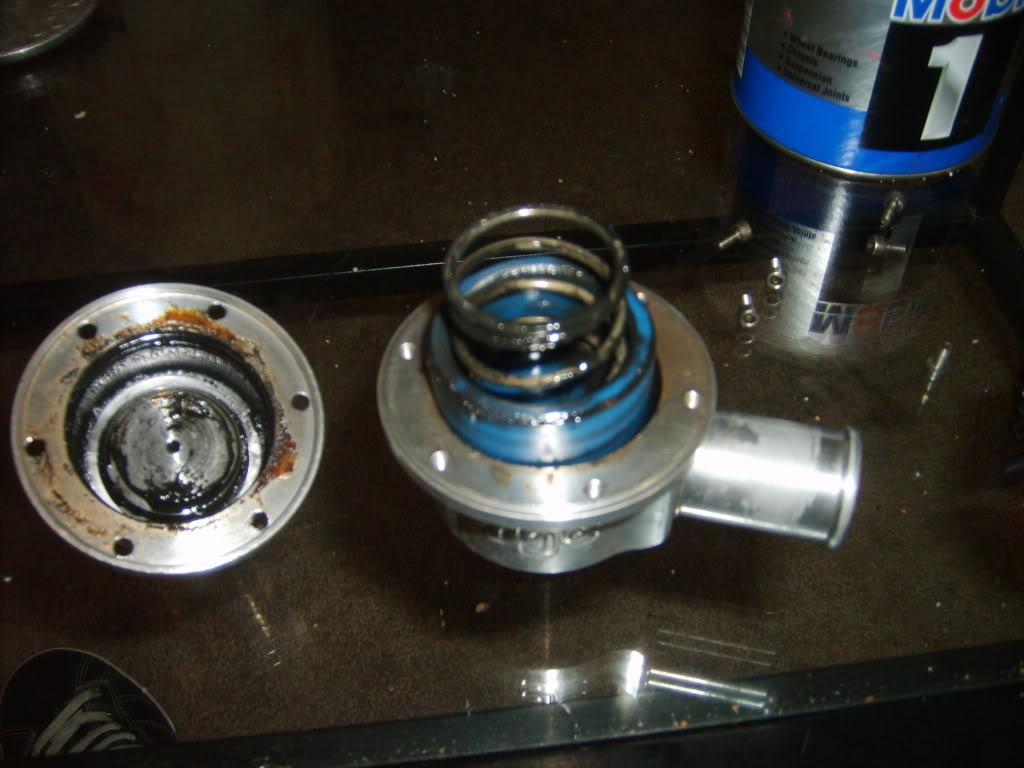 [ul][*]Clean the entire DV/BOV[/ul]
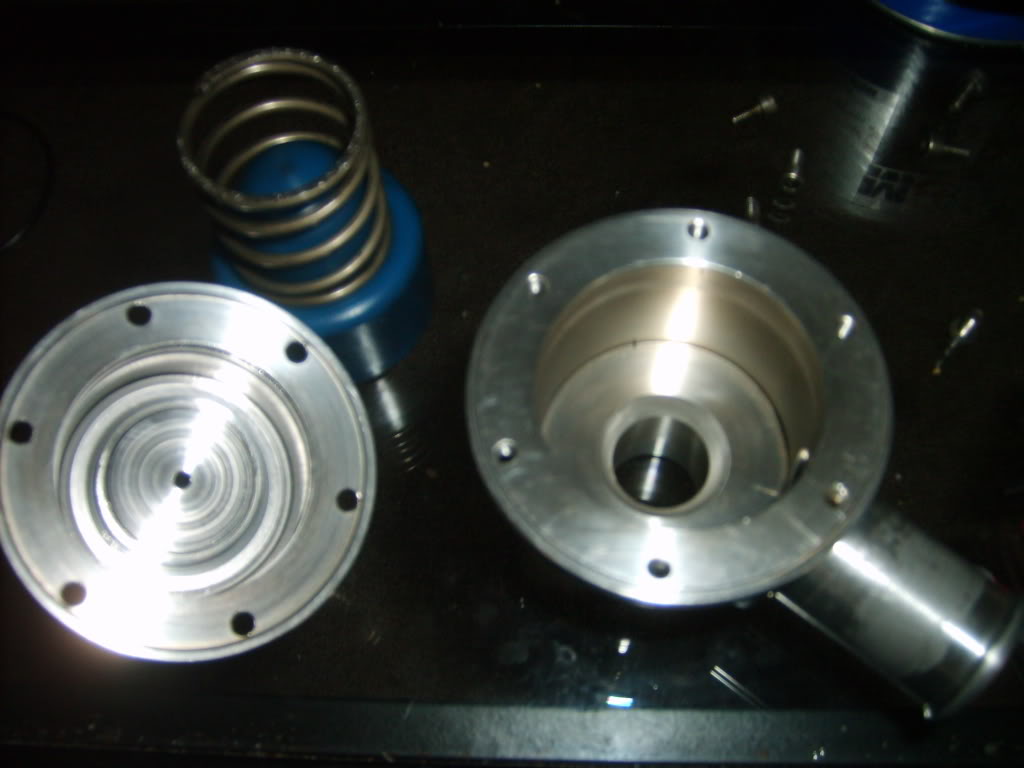 [ul][*]Apply some grease to the piston and the o-rings. I recommend Mobil 1 high temp grease[/ul] [ul][*]Put everything back together and screw the 6 screws back in [/ul]
Installing the Valve
Side note: Many people do this from the bottom after jacking it up, but I find it easier doing it from the top. You can pop out the headlight to give you more room to work in. Either way the instructions are basically the same [ul][*]Remove the side marker if you have the 2 piece style headlights by unclipping the clip in the back and pushing it straight out[/ul]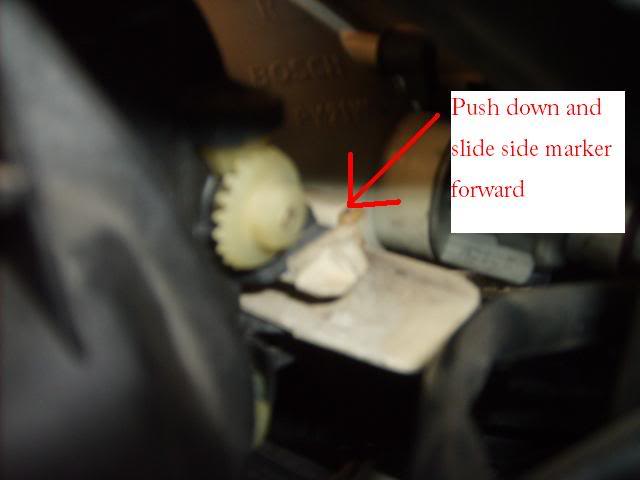 [ul][*]Remove the 3 screws using a T30. My side screw wasn't a T30 bolt for some reason but yours should be[/ul]
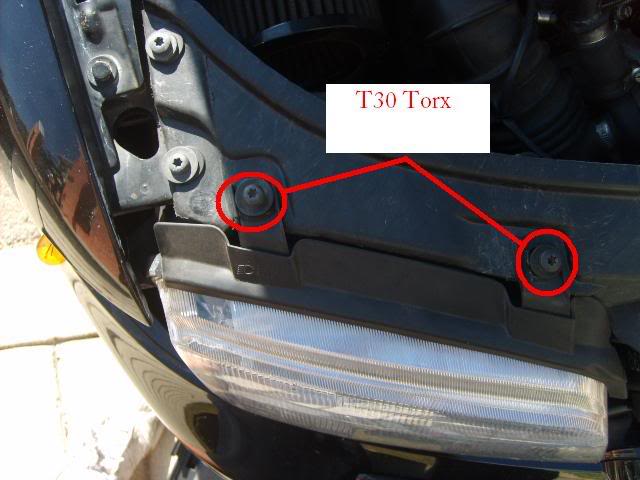
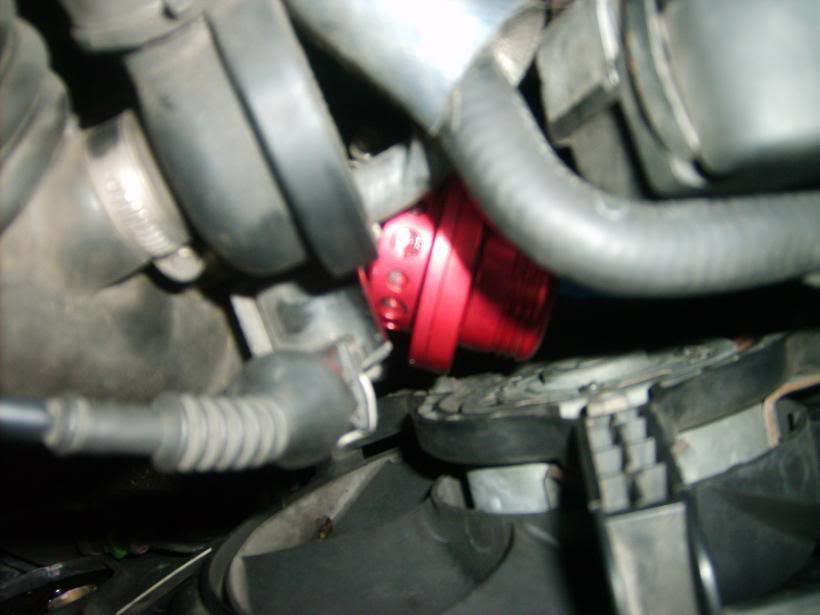
 [ul][*]Remove the headlight. I couldn't remove mine because of a wire I couldn't disconnect, have no idea why it is like this, but you should be able to remove yours by detaching a clip. If you can't just sliding it up forward will be sufficient enough[/ul]Location of DV
 [ul][*]Remove the clamp coming from the TIP by using a long extension (or pry off the 1 time clips if you have the stock dv) [/ul]
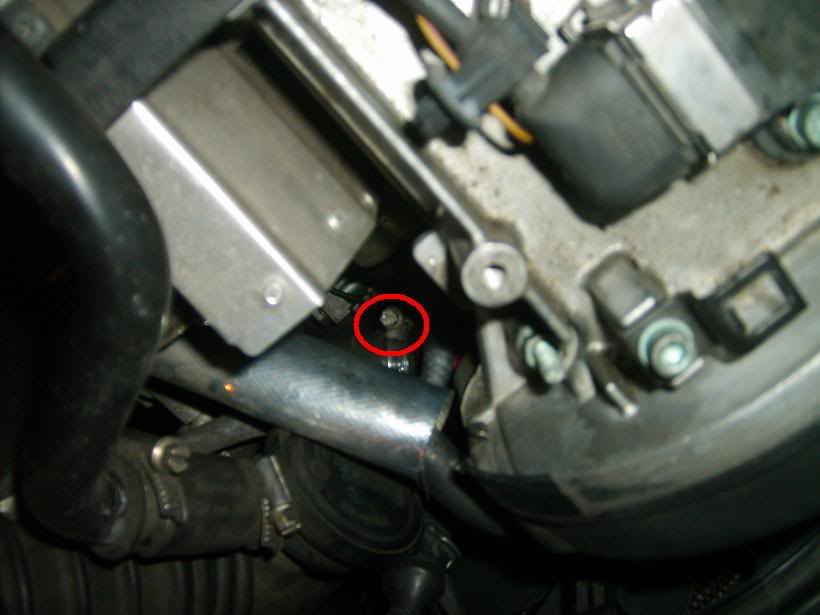 [ul][*]Pull the DV up to the top, the hose leading to the turbo outlet hose should be in some clips so take them out before pulling the DV up[/ul] [ul][*]Remove the other clamp and vacuum line[/ul] [ul][*]For a DV you just plug everything back in, reverse of how the stock dv was. The bottom goes to the turbo outlet hose, and the side goes to the TIP. Just do the side while you have it at the top and then plug the bottom back in and tighten it the same way you loosened it. Make sure to put the hose leading to the turbo outlet hose back in its clips, and zip tie the vacuum hose out of the way from the fan by tying it to the coolant hose[ul][*]If anyone installing an APR R1 is using this guide, you will actually put the bottom going towards the TIP, and the side going into the turbo outlet hose. This is because with diaphragms, the pressure needs to come in from the side so that there isn't constant pressure beeing put on both sides of the diaphragm, like if you were to put the bottom of the valve into the turbo outlet hose.[*]Also some people run their piston style DV's (like Forge) the way the stock valve is run, with the bottom going towards the TIP, and side to the turbo outlet hose. Normally piston type valves are installed with the pressure under the valve so that it helps open the valve when the pressure in the small vac line is released and becomes vacuum. If you install it so that the pressure is coming in thru the side it ends up forcing the piston inside toward one side of the valve causing it to have some drag while it is trying to open/close. For some the only difference is how loud the DV is, but for others they also notice an increase in psi, so it's worth trying both ways. [/ul][/ul] [ul][*]For a BOV like the Forge 004 you plug the TIP with a 1" billet plug, remove the hose which you used to run up to your DV, and plug the bottom of the 004 to the turbo outlet hose. [/ul] [ul][*]Apply alcohol and bandaids to cut up hands [8D][/ul]
To help illustrate where the DV connects to I made some modifications to a drawing created by Redgoat. Here's his original drawing which shows how you can mount a BOV on your intercooler piping.

Here's my modified drawing showing how to install a DV/BOV on an AEB engine

Later B5's have the DV placed lower than on AEB engine's so I modified it again to show how to install a DV (in this case a Forge Splitter). The connection's are the same, only the placement is different.

Tools Required [ul][*]Socket Wrench[*]T30 Hex Bit (unless you have really small hands)[*]Screwdriver[*]New Vacuum hose (if yours is old or cracking)[*]Clamps [/ul]
Servicing the Valve [ul][*]Remove the 6 screws using a 2mm hex key. As soon as you remove the screws it should want to pop open to release the springs tension.[/ul]BOV
DV
[ul][*]Clean the entire DV/BOV[/ul] [ul][*]Apply some grease to the piston and the o-rings. I recommend Mobil 1 high temp grease[/ul] [ul][*]Put everything back together and screw the 6 screws back in [/ul] Installing the Valve
Side note: Many people do this from the bottom after jacking it up, but I find it easier doing it from the top. You can pop out the headlight to give you more room to work in. Either way the instructions are basically the same [ul][*]Remove the side marker if you have the 2 piece style headlights by unclipping the clip in the back and pushing it straight out[/ul]
[ul][*]Remove the 3 screws using a T30. My side screw wasn't a T30 bolt for some reason but yours should be[/ul] [ul][*]Remove the headlight. I couldn't remove mine because of a wire I couldn't disconnect, have no idea why it is like this, but you should be able to remove yours by detaching a clip. If you can't just sliding it up forward will be sufficient enough[/ul]Location of DV [ul][*]Remove the clamp coming from the TIP by using a long extension (or pry off the 1 time clips if you have the stock dv) [/ul] [ul][*]Pull the DV up to the top, the hose leading to the turbo outlet hose should be in some clips so take them out before pulling the DV up[/ul] [ul][*]Remove the other clamp and vacuum line[/ul] [ul][*]For a DV you just plug everything back in, reverse of how the stock dv was. The bottom goes to the turbo outlet hose, and the side goes to the TIP. Just do the side while you have it at the top and then plug the bottom back in and tighten it the same way you loosened it. Make sure to put the hose leading to the turbo outlet hose back in its clips, and zip tie the vacuum hose out of the way from the fan by tying it to the coolant hose[ul][*]If anyone installing an APR R1 is using this guide, you will actually put the bottom going towards the TIP, and the side going into the turbo outlet hose. This is because with diaphragms, the pressure needs to come in from the side so that there isn't constant pressure beeing put on both sides of the diaphragm, like if you were to put the bottom of the valve into the turbo outlet hose.[*]Also some people run their piston style DV's (like Forge) the way the stock valve is run, with the bottom going towards the TIP, and side to the turbo outlet hose. Normally piston type valves are installed with the pressure under the valve so that it helps open the valve when the pressure in the small vac line is released and becomes vacuum. If you install it so that the pressure is coming in thru the side it ends up forcing the piston inside toward one side of the valve causing it to have some drag while it is trying to open/close. For some the only difference is how loud the DV is, but for others they also notice an increase in psi, so it's worth trying both ways. [/ul][/ul] [ul][*]For a BOV like the Forge 004 you plug the TIP with a 1" billet plug, remove the hose which you used to run up to your DV, and plug the bottom of the 004 to the turbo outlet hose. [/ul] [ul][*]Apply alcohol and bandaids to cut up hands [8D][/ul]To help illustrate where the DV connects to I made some modifications to a drawing created by Redgoat. Here's his original drawing which shows how you can mount a BOV on your intercooler piping.
Here's my modified drawing showing how to install a DV/BOV on an AEB engine
Later B5's have the DV placed lower than on AEB engine's so I modified it again to show how to install a DV (in this case a Forge Splitter). The connection's are the same, only the placement is different.
#2
12-07-2007, 08:33 PM
i also have video comparisons, but its taking forever to upload...

Thread
Thread Starter
Forum
Replies
Last Post